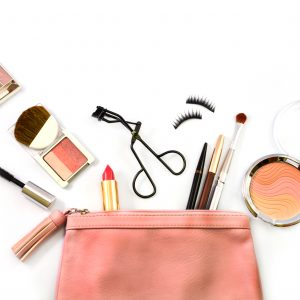
Northern California/Bay Area Modeling
Our 4 Best Hand-picked Glow Enhancing Gadgets
2 years ago we were all searching for the most matte foundations and powders we could get our hands on, trying to prove that our skin produces ZERO oil. However, just as the weather changes with the seasons, so do our trends! You may have noticed recently that every magazine, top modeling agency, and self proclaimed insta model accounts show girls with skin that shines like no other! So now we look at these gorgeous women and wonder, “How can I make my skin glow just the same as the top models?” Wonder no more! As we have comprised the exclusive, never before seen list that all glowing models use to keep their shine bright!
-
Illuminators
One HUGE thing in our industry that not everyone knows about is illuminators! Some of you may not even know what this wonderful product is or does. The first thing you must understand is illuminators are NOTHING like highlighters. While highlighters help emphasize certain areas on top of your foundation, powder, and other beauty products; illuminators cover your WHOLE face for an undeniable, full-faced glow. If your entire face isn’t as radiant as you would like for it to be, or maybe your foundation is a little too matte for your liking and you want a beautiful, dewy look, this is your new go-to makeup product! A dime size amount of any one of the grade-A illuminators we have hand selected for you will take your skin from DULL to FULL! Now that you know what they are, you may be wondering how to apply these skin-saving products!
Illuminators can be applied in several different ways, however the way we found most effective was after primer but before foundation. After applying your best primer, grab your favorite liquid illuminator that closely matches your skin color and apply 3 small dots on each of your “highlight areas,” (Cheekbones, bridge of the nose, above and below eyebrows, above the lip, and tip of the nose.) Using a wet beauty blender, slowly blend evenly into your skin. After it is completely blended, you can apply your foundation and the rest of your makeup as you usually do. This will give you an all over highlight that will shine through your foundation and give you the most beautiful sun-kissed look you could ever ask for!
-
Retinol
While retinol isn’t known to necessarily bring out your glow, it has many wonderful benefits that will smooth your face and make it appear youthful and lively. First you need to understand what retinol actually does. It diminishes the appearance of fine lines and wrinkles, as well as helping to even out your skin tone, promote firmness and smooth out your skin. Our absolute favorite retinol moisturizer that not only adds this wonderful product to your skin but also adds moisture to create a beautiful, radiant glow is Olay Regenerist Micro-Sculpting Cream Face Moisturizer. We love this product because it also has our 4th product, hyaluronic acid, added as one of the main active ingredients. Not only that, but it smells absolutely amazing! This moisture-binding formula instantly plumps and lifts surface cells to create the nicest glowing face you could imagine!
-
Specific face wash
It’s super important to remember that the way you take your makeup off matters just as much as how you put it on. The products you use on your face will greatly determine how easy it is to make your face glow the way it is meant to. Using the right combination of skin care products means you shouldn’t have to worry as much about packing on the highlighters, as you will have a sun kissed look with or without makeup.
With that in mind, you must use the correct face wash in the morning and at night to improve your skin itself. We tirelessly searched for the best products for you to improve your glow. Here are the amazing face washes we finally found that will change your life forever!\
Morning Wash
L’Oreal Paris White Perfect Facial Milky Foam- This product will show you amazing, glowing results after the first use. Only a dime sized amount will create an even, foamy lather for your whole face. Not only does it work wonderfully to rid your face of dirt and oils to create a radiant, rosy glow, it also smells amazing! This product is only about $15 at most advanced cosmetics stores, or even easier to order off Amazon and get it next day! We love this product and so will you. Use it every morning before applying makeup and you will see amazing results!
Midday Touch-Up
Olay Clearly Clean Oil Reducing Cleansing Cloths- It’s the middle of the day and you just got home from work, or finished a workout and you MUST clean off your face before touching up your makeup and heading out for the night. The best, easiest to use product is a cleansing face wipe, and Olay is the brand that carries the best bang for your buck! Not only is this product great, but just the act of cleansing your face midway through the day will help to illuminate your skin for the rest of the night as well as clear out all the built up dirt and oil for a long term radiance. The best thing about these wipes in particular is that they get all the gross stuff out of your pores without drying out your skin. Most other products that help to clear the skin will also dry it out, however not this one! That is why we chose these face wipes to boost your glow as well as clear your skin!
2-Part Night Wash
The first thing you must do at night is remove all your makeup. Now, get ready to throw everything you’ve learned about taking off makeup in the trash and replace it with a new routine! Any other night you reach for your make-up removing wet wipes and quickly wipe down your face before splashing any old bar of soap and heading to bed. NOT ANYMORE! Throw those wipes in the trash and pick up our favorite makeup remover- Garnier SkinActive Micellar Water. This is our go-to remover as it is one of the only products we found that has no oil in it, and doesn’t dry out your face! Spread a good amount evenly on a washcloth and rub it over your whole face. The wash cloth makes sure to clean the foundation out of all your pores so your face wash doesn’t have to work as hard! This guarantees you won’t have any build up when you go to reapply tomorrow morning’s makeup! It is very important you use a washcloth to put this product on, AND to rinse off as the dirt and oils from your hands cause bad breakouts even on the clearest of skin.
Now, it’s time to actually wash your face. If your skin does look dull and lifeless, there’s a chance it’s due to your top layer of skin being incorrectly exfoliated, leading to the build up of dead skin. To beat the dullness and bring back your fresh, glowing face, we have 2 exclusive products that should be used together every night to boost your model radiance through your own cellular regeneration.
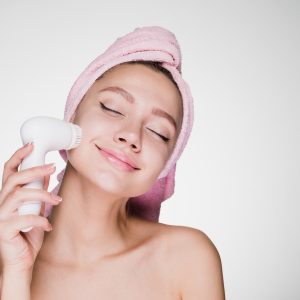
1. The most important thing to use to really rid yourself of pore-clogging build up is a spinning facial brush. We love the ProX by Olay. However, any rotating facial cleansing brush will do. These brushes help to penetrate the skin, remove dirt and oil build up, and add the glow you need to have constant radiant skin. Pair this brush with the cleanser we are about to give you and you will shine brighter than you ever thought possible!
2. Korres Wild Rose Daily Brightening & Refinishing Buff Cleanser- This is our absolute favorite night time cleanser that will help your skin repair itself while you sleep. With Wild Rose Oil, Rice Grain, Cherry Stone, and Sugar Extracts, this product contains every ingredient we suggest to deep clean, exfoliate, and boost skin regeneration throughout the night. You can get this product at Sephora RIGHT NOW for only $28! Who wouldn’t pay that for gorgeous, glowing skin?!
-
Hyaluronic Acid
For our final product, we are letting you in on our exclusive secret product! Hyaluronic Acid has so many wonderful benefits that not only promotes glowing skin but also reverses the effects of aging, adds hydration, and firms your skin. On top of all these wonderful things, it also fortifies the skin’s natural barriers to help lock moisture in for an even more dramatic hydrating effect. Over time, this can help slow down the the deterioration of the lipid barrier and help protect the skin from outside toxins. It also works to create a smoother all-over texture for any area it is applied to and stimulates skin cell regeneration! This is our literal miracle product and clearly has SO many great benefits. Our favorite brand that contains this ingredient is Olay Age Defying ADVANCED Gel Cream Moisturizer with Hyaluronic Acid. This is our go-to brand because it’s formulated specifically to deliver 24 hours of deep hydration to tight, dry skin, and reveal a more youthful-looking complexion. It is a lightweight face gel cream that works to absorb quickly, instantly renewing skin’s moisture and improving skin dullness without clogging pores, revealing skin that feels silky, smooth and nourished with hydration. If one thing’s for sure, it’s that you MUST add this product to your daily routine.
If you follow every instruction we gave you in this article, or even just implement one of them into your daily life, we guarantee you will have the most perfect, glowing skin any woman can have in the modeling industry.
Find out your Face Shape!
There are many reasons why it’s super important to know your face shape, such as determining how to properly contour your face, which haircut will work best for you, finding the pair of glasses that fit you best, along with many other things. These things are very important for you working in the modeling industry to know and for you to be able to use in your daily life, so you are able to look perfect at every professional shoot, booking, and event. Follow the steps listed below to find yours today!
Step 1
The first step in determining your face shape is figuring out which part of your face is the widest. This can be done by measuring each area of your face and comparing the width to each other.
1. Widest forehead- If your forehead is the widest part of your face, your face shape probably falls under inverted triangle or heart shaped. The next steps will help you in determining the difference.
2. Widest at cheekbones- Oval, round, diamond and heart-shaped faces all fall under the category of having the widest part of your face fall at your cheekbones. However, the shape of your jaw can greatly affect which shape is truly yours.
3. Widest jaw- Having your jaw as the widest area of your face almost always means you have a pear shaped face. If this is ture, there is no need to measure anymore face areas as we have already found your shape! Skip to pear to understand what your shape means about you!
4. All equal- If every area of your face is equal, this means you either have a long or square face. Your result is greatly affected by your jaw shape and length of your face, so keep reading to find your true match!
Step 2
The second step is to figure out which category your jaw shape falls under. Just simply look at your jaw, does it look…
1. Round- If your jaw looks round, this can indicate a round face. However, it can also cause you to be classified as having an oblong or oval face. This all depends on the length of your face, so go to step 3 to learn more!
2. Pointy- This can indicate a few different shapes, such as diamond, inverted triangle, or heart shaped. The way to tell these shapes apart is by looking at the rest of your face and how it compares to your chin. Is your forehead the widest part of your face? This means your face shape is either classified as inverted triangle or heart shaped. To figure out which one, move on to step 4 to narrow it down to your shape. Are your cheekbones the widest part of your face, with a narrow forehead and chin? If so, that means you have a diamond shaped face.
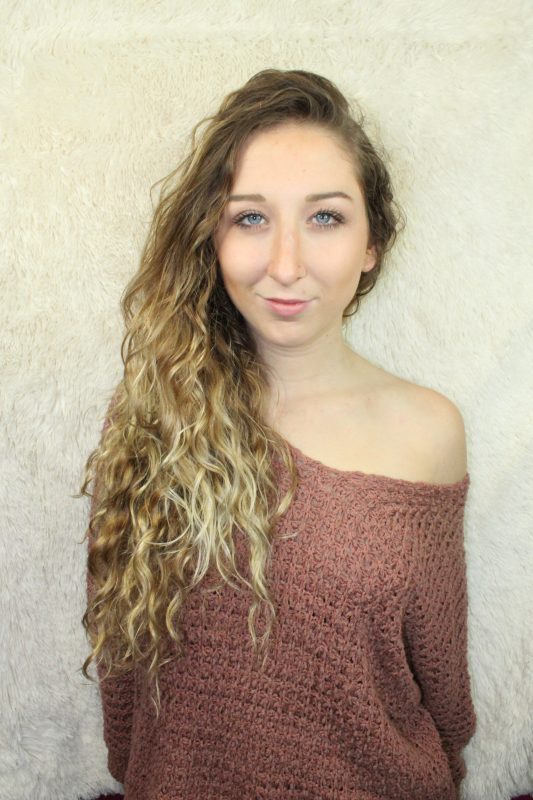
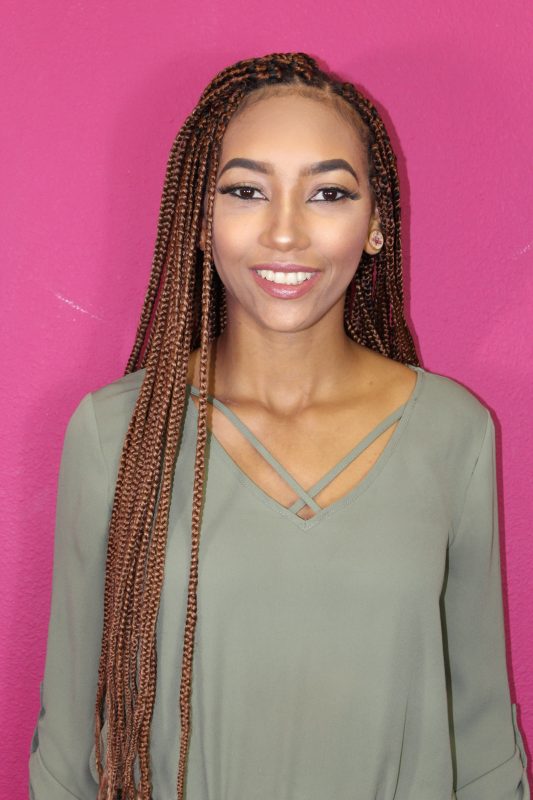

Diamond Face Shape
3. Square- The most common face shape that comes along with having a square jaw is a square or rectangle face. The only way to truly determine which one you have is to measure the length of your face in step 3! You have a square face when all of your facial features are approximately the same width. However, once in a while when you have a square jaw it also can mean that you have a triangle shaped face. This occurs when your forehead is far narrower than the jaw itself.
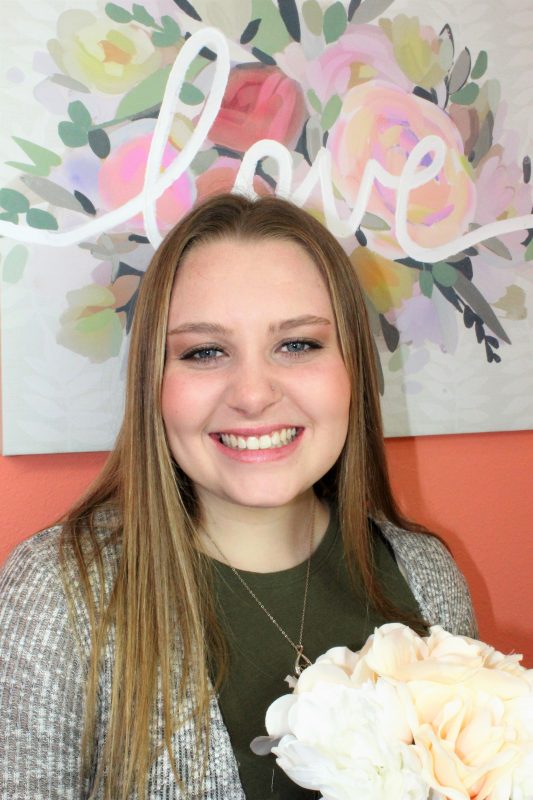
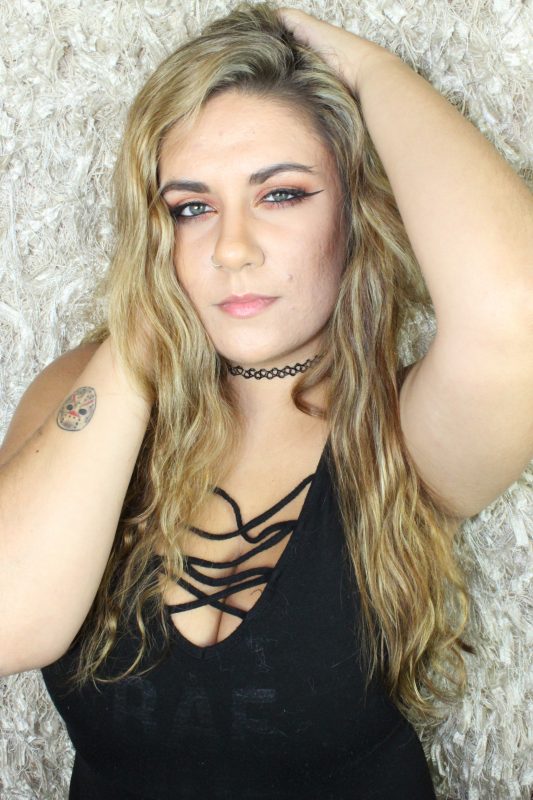
Square Face


Triangle Face Shape
Step 3
Third step to figuring out your unique face shape is measuring the length of your face, then comparing to the width of your other features.
1. Long- Your face shape is considered oblong if it’s length is greater than its width, all your facial features are also equal in length, and you have a slightly rounded jaw. If you have a long face and a squared jaw, this means you have a rectangle shaped face!
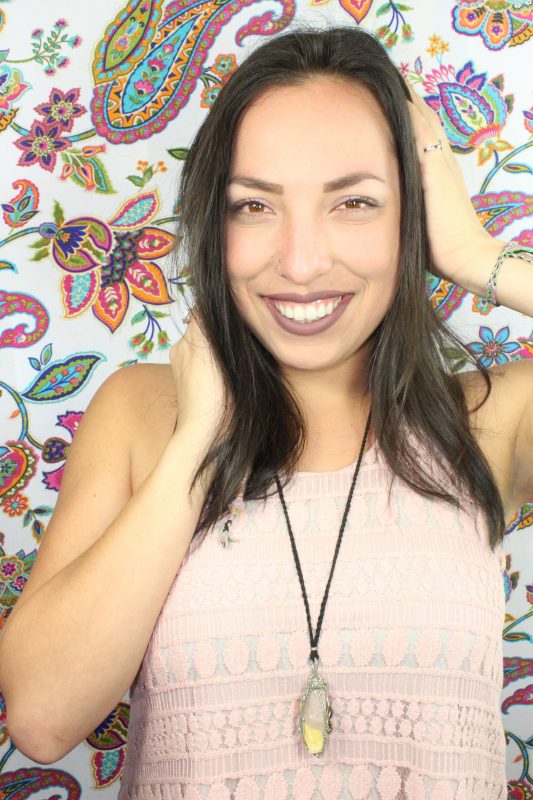

Oblong Face Shape

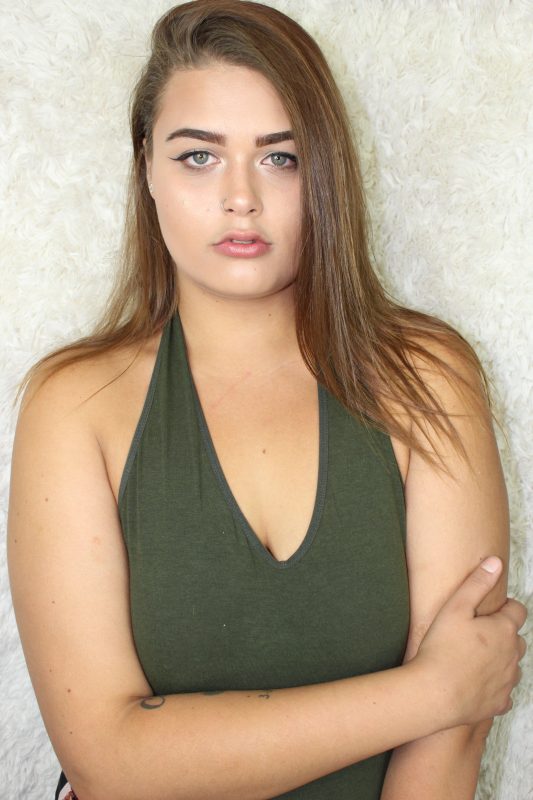
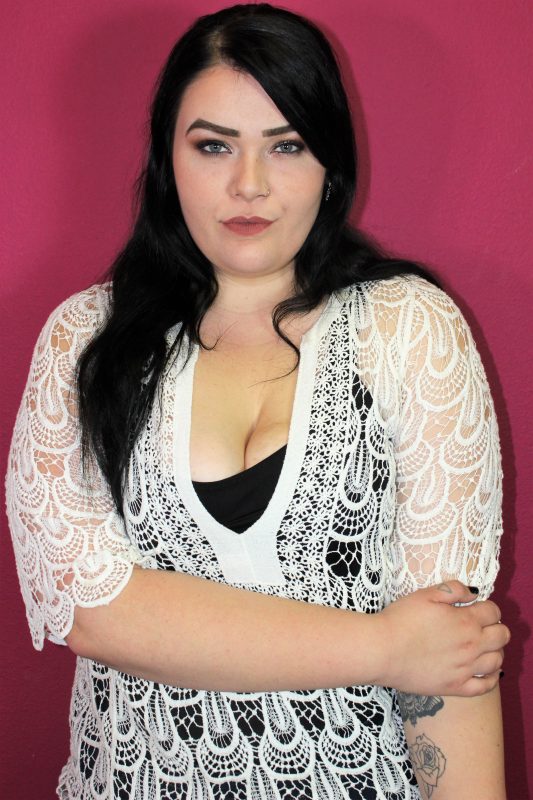
Rectangle Face Shape
2. Average- Is your face slightly longer than it is wide, with your cheekbones being the widest part of your face, and a rounded chin? If all that is true, your face shape is described as oval! However, if your chin is pointed, you either have a heart shaped face or an inverted triangle. Step 4 will give you insight to which of the two shapes you fit under.
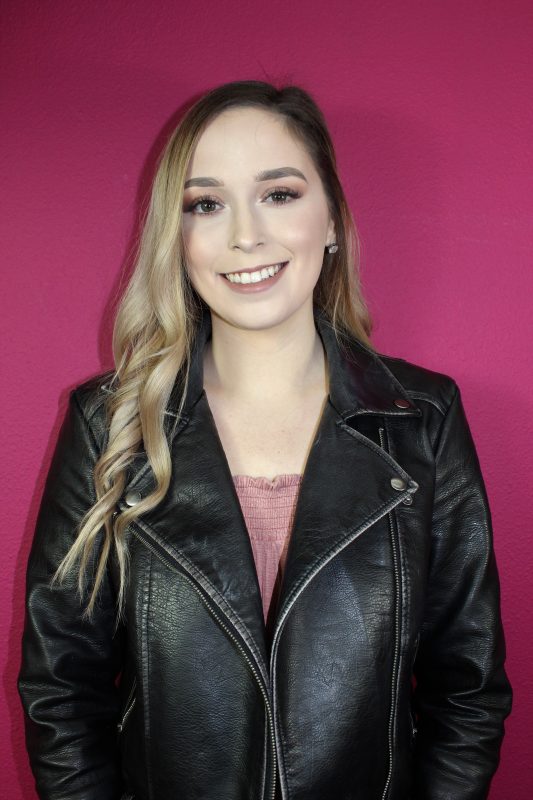

Oval Shaped Face
3. Short- Your face is short when the length and the width are about equal. When you fit under this description and your jaw is also rounded, you have a round face shape.
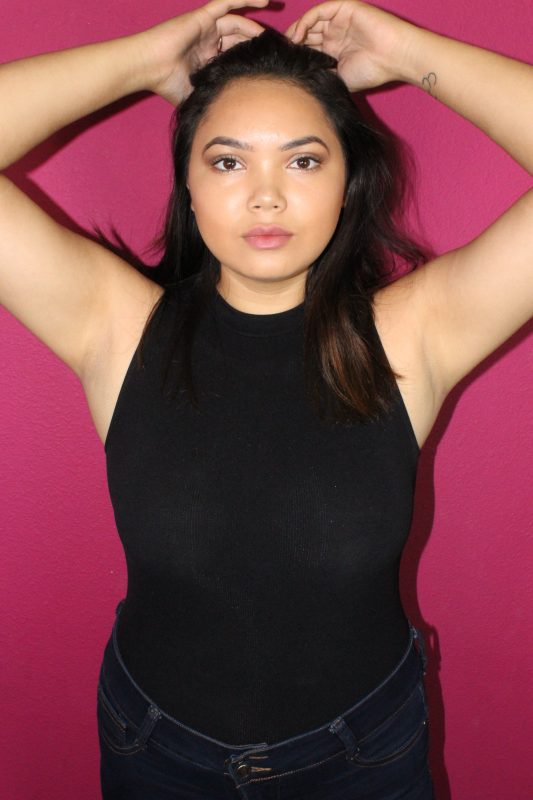
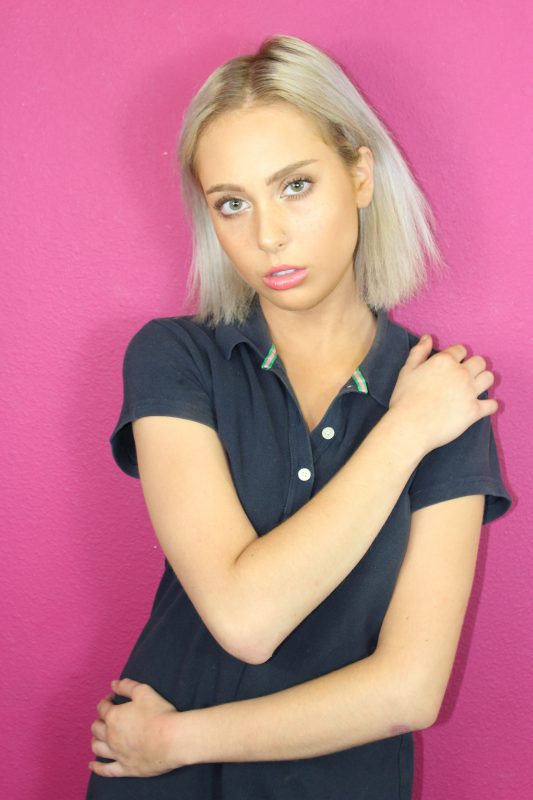

Round Face
Step 4
The final step before knowing your face shape is to determine whether or not you have a widows peak. This will help those with a pointy chin to determine if they have a heart shaped face or an inverted triangle.
1. Widows peak- If your cheekbones and forehead are about equal in length and you do have a widows peak, you have a heart shaped face.

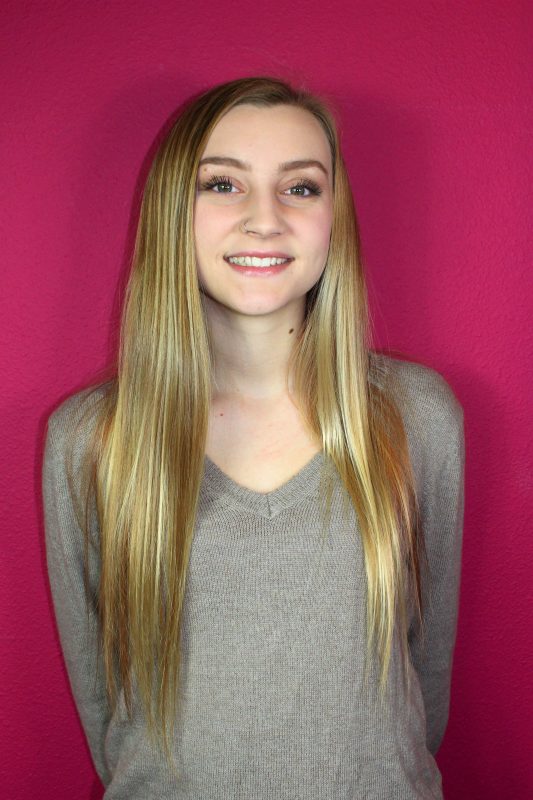
Heart Shape
2. No widows peak- Your forehead is the widest part of your face and you do not have a widows peak, you have an inverted triangle.

Inverted Triangle
This guide will help you gain all the understanding of face shape and how to determine yours. Once you have this information, along with your skin tone, you will be able to do your makeup like all the women at top modeling agencies and have it look absolutely perfect every time!
Determine Your Skin Tone
Knowing which skin tone you are is extremely important knowledge every women who is into commercial modeling, glamour modeling, and the like should know, however most people don’t! If you don’t know your undertones and all-over skin tone, how will you find your perfect fit foundation? Or know which color contour palette you should buy? After reading this article you will look flawless in ALL your makeup, 100% of the time!
Understanding the undertones
The first important thing to know is what exactly you are looking for when finding your skin tone. The first thing you must find out is the undertone of your skin. There are three different types of undertones, warm, cool, or neutral. Warm undertones will cause your skin to appear golden, yellow, or peachy. Cool undertones cause blue, pink, or red skin tones. Unable to figure out if you are warm or cool? This most likely means you are neutral. With a neutral undertone, your skin will make it practically impossible to categorize as warm or cool, or it could even look like a mix of all or some of these colors. It can appear olive, yellow or even a shade of pink. Now that you understand the different undertones, it’s time to…
Figure out your undertone!
There are several different ways to pinpoint which undertone your skins reflects. Some of them are fairly easy, while others are a bit more complicated…
The Burn Test
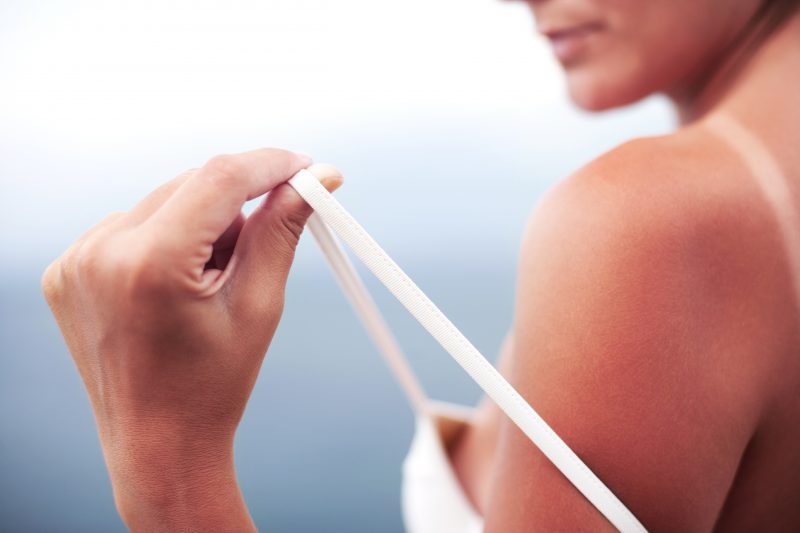
The easiest way to determine your undertone without even having to get up off your couch is to do the burnt test. This just involves thinking about the way you tan, or don’t tan, during a hot day in the sun.
If laying out in the sun all day leaves you with a nice tan and no burning and peeling later, this means that you have warm undertones. People with these undertones tan very fast and easy and rarely ever burn. However this doesn’t mean you should completely throw out your SPF! No matter what skin tone you are it is important to remember sun will still damage your skin whether you’re bright red and peeling or a nice crispy tan. The only reason why we age is because of gravitational forces acting on us and radiation from the sun, so always wear your sunblock when going outside!
You go home after a nice day of swimming and lounging around and immediately head for your bottle of aloe vera- you probably have cool undertones. Anyone with blue or pinkish tones will find themselves burning extremely easily, or even just not tanning in general. If laying out for days on end leaves you with the same shade you were mid-December, you probably also have these cool undertones.
“I tan very slowly, but I rarely ever burn!” Ahh yes, the beloved neutral toned goddess! If you can get a nice, gorgeous tan after a longer amount of time under the sun, with no itchy red burns, you have the easiest undertone there is. People with neutral undertones have the easiest time finding foundations and powders that fit them as there skin tone will match with almost any product.
The Vein Test
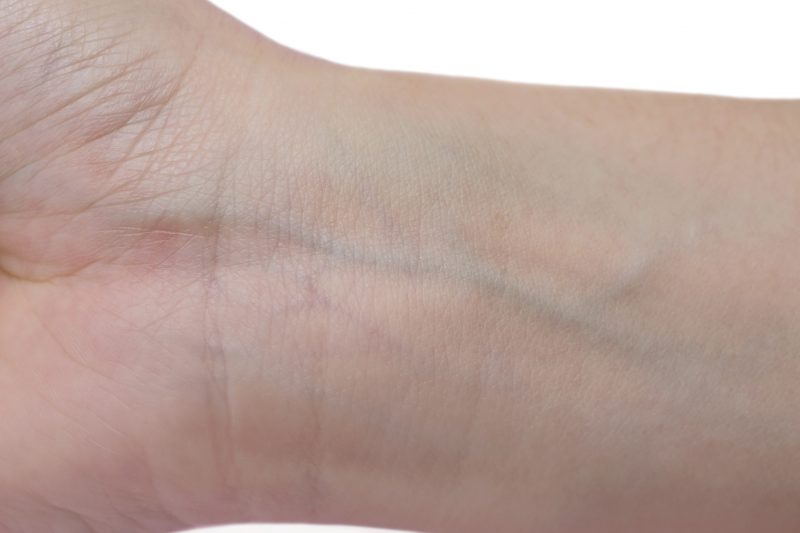
Another wonderfully easy test that you don’t have to get out of bed for! The only thing you’ll need is a good set of eyeballs! Look at the inside of your wrist and glace at the veins, if they are…
Blue or purple, this mean you have cool tones.
Any shade of green, you have warm tones.
Indistinguishable, if you can’t tell what specific color your veins are then you have neutral tones
The Foundation Test.
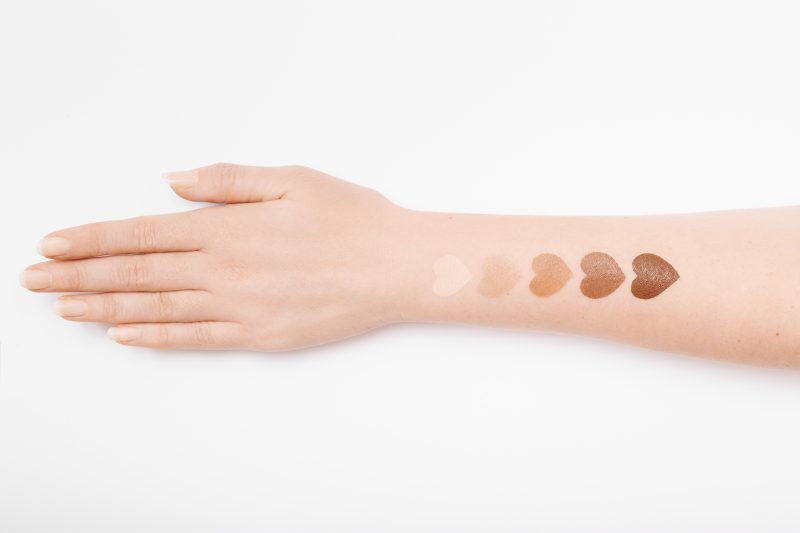
The last super simple test we have for you is the foundation test.
Grab the shade of foundation that matches your skin tone best, one for warm tones and one for cool.
Apply a line of this onto either your neck or chest.
Whichever one totally blends into your skin is your true match, and you’ve just figured out your undertone! If they both seamlessly disappear, you got lucky enough to have neutral undertones!
Once you have done any of these tests and you know your skin tone, you are ready to get perfect, skin matching makeup every time and be prepared to live your daily life! Whether it’s going to a model casting or taking your professional head shots, you will always look flawless.
Things To Keep In Mind Before Your First Portfolio Shoot
It’s natural to get caught up in the excitement of your very first photoshoot and forget everything you thought you may have known about modeling. While you may be nervous no matter what, these tips will help you develop a confident approach and help to make your pictures amazing!
Tip #1
One super important thing to remember is to know the people you are working with and do your best to identify the professionals from just any random person with a camera claiming to be a photographer. Be careful who you allow to take your pictures and take the extra step to look through their past work and even consider reaching out to models they have worked with previously and asking any questions or concerns you may have.
Tip #2
Listen to Others
Most models do not realize what is needed to get that perfect image until after their first shoot, however your photographer and your modeling firm (if you decide to work with one) can be very helpful in getting you prepared.
-Once you find a photographer with a credible reputation, one important thing to keep in mind is to listen to what they are telling you. A professional photographer and other professionals in the industry are experienced and know what they are looking for in their pictures.
-If they tell you a certain pose, outfit, or makeup style is not working for you- LISTEN TO THEM! They have done this several times and are only there to help make you look the best you possibly can.
-You can also look at various modeling company’s websites, such as ours, and the models profiles on them. As you can see, their portfolios are made of raw, natural, and black & white photos. These are the type of pictures your first shoot will involve, so be sure to carefully study them!
Tip #3
Look at Magazines
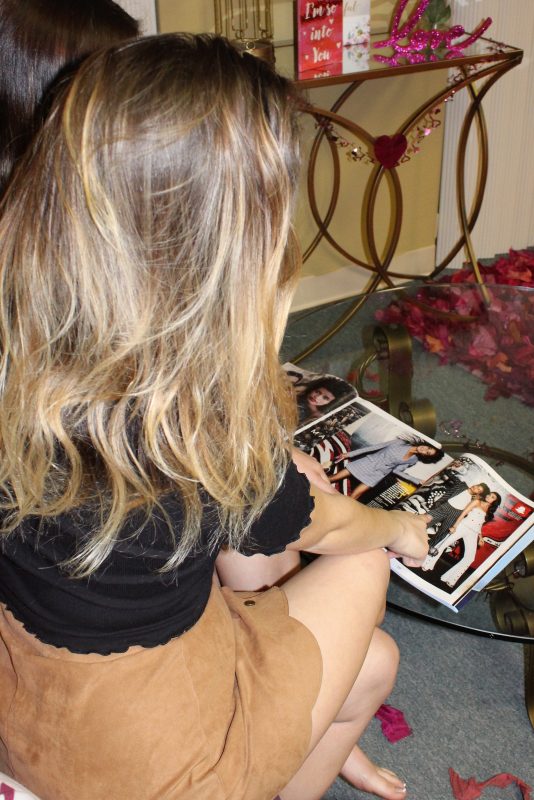
The best thing you can do to prepare yourself for your photoshoot is to look at pictures that other models have already taken. This can be done by looking through beauty and fashion magazines such as Vogue, Cosmo, and many others!
-Looking at these pictures will help you get a feel for not only what other models in the industry are doing, but also will help you find an aesthetic that you love.
-You will notice you are drawn to certain types of pictures, be it a pastel look, grunge vibes, or pictures with fun colorful lighting, recognizing which look you are drawn to most will help you determine the type of look and modeling you are interested in.

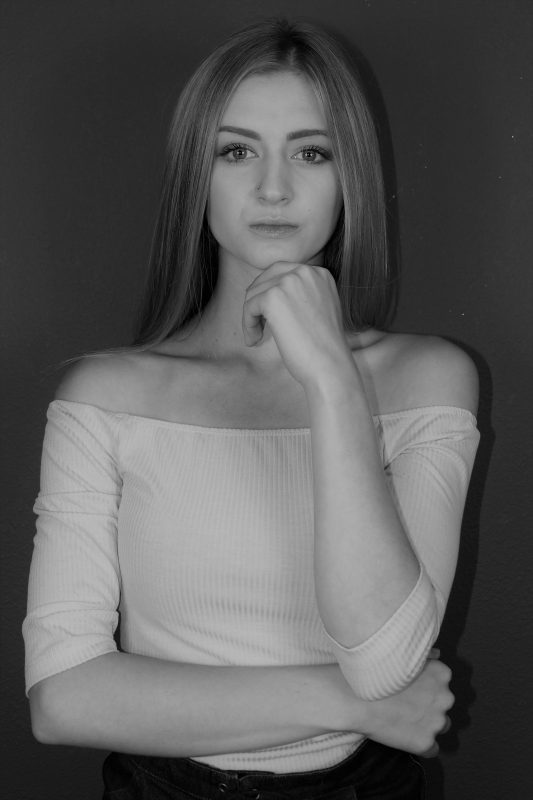
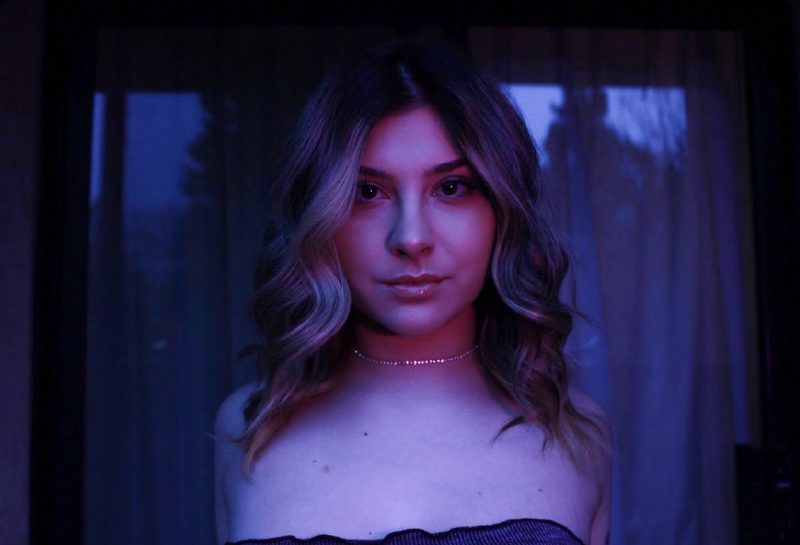
While finding an aesthetic that works well with you is important, it’s also crucial to see which poses work best with your body type, face shape, and hair style.
-Look for models that have an appearance similar to yours and copy the poses that they are doing. This will help you because the pictures posted in magazines are the best of the best, therefore the poses that you see them doing are the #1 poses to optimize their beauty.
–Here is our model guide to poses.
Tip #4
Knowing the People That Will Assist You
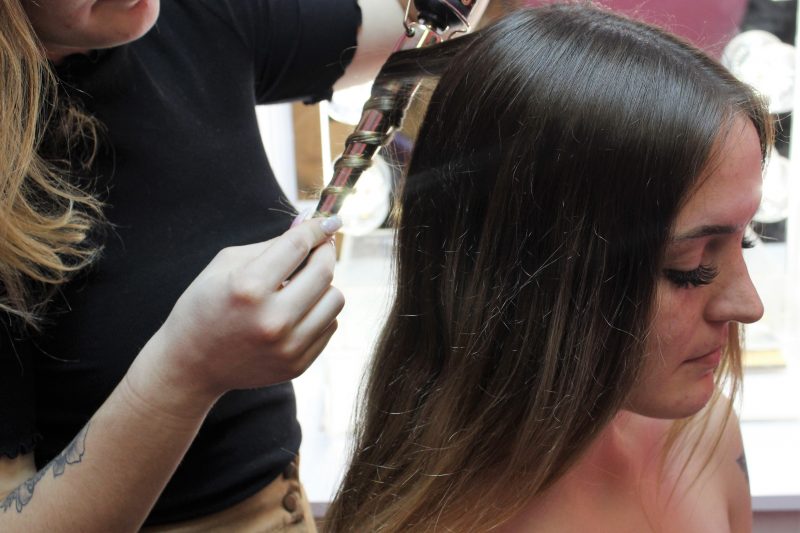
-Try to get more information about the people who’ll accompany you on the shoot. It’s always helpful to have a collaborator on board such as a hair, makeup, or clothing stylist.
-Make sure to ask your photographer, or whoever will be doing your shoot, any questions you may have. They will almost always tell you what to put in your model bag. If they do not give you a specific list, you can look at our universal model bag suggestions here.
-Ask beforehand how they prefer you to have your hair and makeup done. Some photographers prefer a completely natural look, while others would rather you have heavier “glam” look.
Be calm and remember that simply portraying yourself as confident can work wonders, no matter how nervous you are! Have fun, be your true self, and never hesitate to show the world what you’ve got!
Interested in modeling? Contact Chico Modeling, a modeling firm based in Northern California and the Bay Area for further queries regarding different types of modeling jobs.
Model Poses
To become successful in the modeling industry, one must learn how to perfect the basic poses for female models based on their personal look. This includes height, weight, face shape, as well as many other factors. Whether you are a model wondering which pose will best suit you, a director casting models or a photographer helping your model to pose for the shoot, this guide will help enhance the look of the pictures and result in your modeling success.
Selecting the right pose for your modeling style can bring about all the difference, especially when photographing for a portfolio, fashion magazine, or any type of advertising.
One of the most important things is recognizing what type of pictures you will be shooting and what they will be used for.
Shoot types can be:
-Headshots
-Portraits
-Portfolio
-Modeling a product
-Lifestyle
-Glamour
-Boudoir
-Artistic/Abstract
Once you recognize what type of shoot you will be involved with, you can start to pick out the pose that will work best for not only that shoot, but you as well.
Beauty Poses
Beauty poses are considered to be the hardest poses to master. A lot depends on the expression, perfect angle, perfect lighting, perfect makeup and hair. For best beauty photography, pay proper attention to:
1.Expression

Expression is the lifeline. Whether it’s neutral, happy or serious, expressions can make or break a picture.
Here is a list of which expression(s) should be used for each individual shoot type!
-Headshots and portfolio shoots are usually taken with a neutral or serious approach.
-Portraits will portray a more natural expression, leaning more towards the happier side.
-When modeling a product, expression depends solely on the type of product you are modeling. If it is something such as makeup, you may take on a neutral or serious look. However, if it’s something such as toothpaste, you will want a happy smiling face!
-Glamour and Boudoir shoots will take on a serious, almost sexy look as they are made to be more sensual than any other shoot.
-Lifestyle shoots will take on a completely natural look, meaning expressions can change frame by frame depending on the activity and how the model is involved in it. This type of commercial shoot is usually paired with a “real-people look,” meaning exactly how one would look on a day to day basis.
-Artistic and abstract shots are a little more complicated and the poses and expressions used will be determined completely by the photographer. Expect to stick with a certain expression the entire time.
2.Jawlines
Jawlines are central to a beauty shot. You must take proper care to highlight them.
One main thing that will help bring out your jawline and make you look the best you can is contouring! Before knowing how you should contour your jaw to make it look the most attractive, you must first determine your face shape.
Once you’ve determined your face shape, take a look at this list and choose which contour style will help you bring out your jawline.
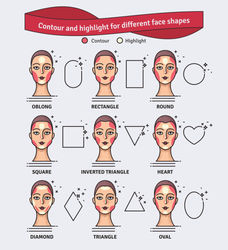
Use your makeup to contour your face as the diagram shows. Once you’ve done this, you will look picture perfect and be ready for any shoot, especially those close ups!
AND THE MOST IMPORTANT THING TO REMEMBER WHEN TAKING HEADSHOTS!!
3.Do NOT Shoot From Below


Bad Angle VS Good Angle
-Shooting from below can and will cause too much chin and nostril to ruin the picture.
-Not only does it focus the camera on those unappealing areas, it also makes them look bigger than they really are.
These few posing tips we gave you will help you to separate the amateurs from the professionals, as well as help all aspiring models out there!
What to Put in Your Model Bag
While preparing for your first shoot may be nerve racking, we’ve put together an exclusive list just for you guys to understand what things photographers suggest you bring with you to your first shoot with them. Keep in mind, you will normally receive a list similar to this from your photographer or agency sometime before you arrive. However, a few photographers may be less prepared and expect you to know what you need for their shoot. These are the basics almost every photographer will ask you to bring.
Assisting products:
-Makeup- For touch-ups
-Lipstick
-Eyeshadows
-Powder
-Concealer
-False Lashes (2 pairs)
-Mascara
-Makeup brushes (Various shapes and sizes)
-Makeup Remover- for any makeup running out of place or makeup mishaps
-Skin Toned and Black Undergarments- must have something to wear under any outfit they may give you
-Hair Products
-Hairpins
-Hair Ties
-Brush AND Comb
-Straightening/Curling device
-Deodorant and Body Products
-Jewelry- different looks of your favorite jewelry in case you need to add some spice to your outfit!
-Eye drops
-Razors and shaving cream- for many different reasons. If you are wearing anything that may show your bikini area, a 5 o’clock shadow can ruin a whole picture.
-Toothbrush and toothpaste
Clothing Items:
1. Little Black Dress- your favorite, simple little black dress!
2. Favorite pair of jeans
3. Tops- different styles in different colors!
Make sure to bring at least 1 of each of the following, in various colors:
-Long sleeve
-Short sleeve
-V-neck
-Crew neck
-Tank top
-Spaghetti strap
-Cardigan
-Sweater
4. Flat Shoes, Sneakers and Heels- any different kind of shoe you could think of that they may ask for, including comfy ones!
Extra things that can be helpful:
-Small Sewing Kit- for any clothing mishaps
-Healthy Snacks and Bottled Water
-Cell Phone Charger- a dead phone can be life threatening in the middle of a shoot!
-Small portable mirror- most photographers will have mirrors there, however it is always good to bring an extra in case they don’t have one readily available
-Tampons/Pads
-Tweezers- stray hairs can drive anyone CRAZY!!!
These universal model bag suggestions will help all models be 100% prepared whether you are going to your first shoot or your 100th! 🙂
